The idea behind this project was to use this opportunity to understand more about networking and the Linux ecosystem. This hands-on experience allowed me to delve deeper into the intricacies of networking protocols, security measures, and system administration within the Linux environment.
As I researched the best way to transform my spare computer into a home server, I discovered Proxmox VE, a type 1 hypervisor. This is a comprehensible solution for all IT enthusiasts, as it is renowned for its robust capabilities. Proxmox empowers users to efficiently manage and deploy virtual machines (VMs) and containers, making it an ideal choice for various home server applications. Its versatility allows for the creation of VMs tailored to specific purposes, such as hosting websites, managing backups, or running diverse applications.
Here are the specifications of the computer:
- CPU: i5 2300 (upgraded to Intel Xeon E3-1275)
- GPU: Palit Geforce 760
- RAM: 2 x 4 GB DDR3 (upgraded to 4 x 8GB DDR3)
- MOBO: INTEL DQ67SW
- PSU: 500W
Once I installed the open-source software Proxmox on my £200 spare computer and completed the initial configuration settings, I gained access to the web-based interface. This interface allowed me to execute various tasks, including uploading VM images, deploying VMs with custom vCPU and RAM allocations, and monitoring the current statistics of both the root node and its associated VMs.
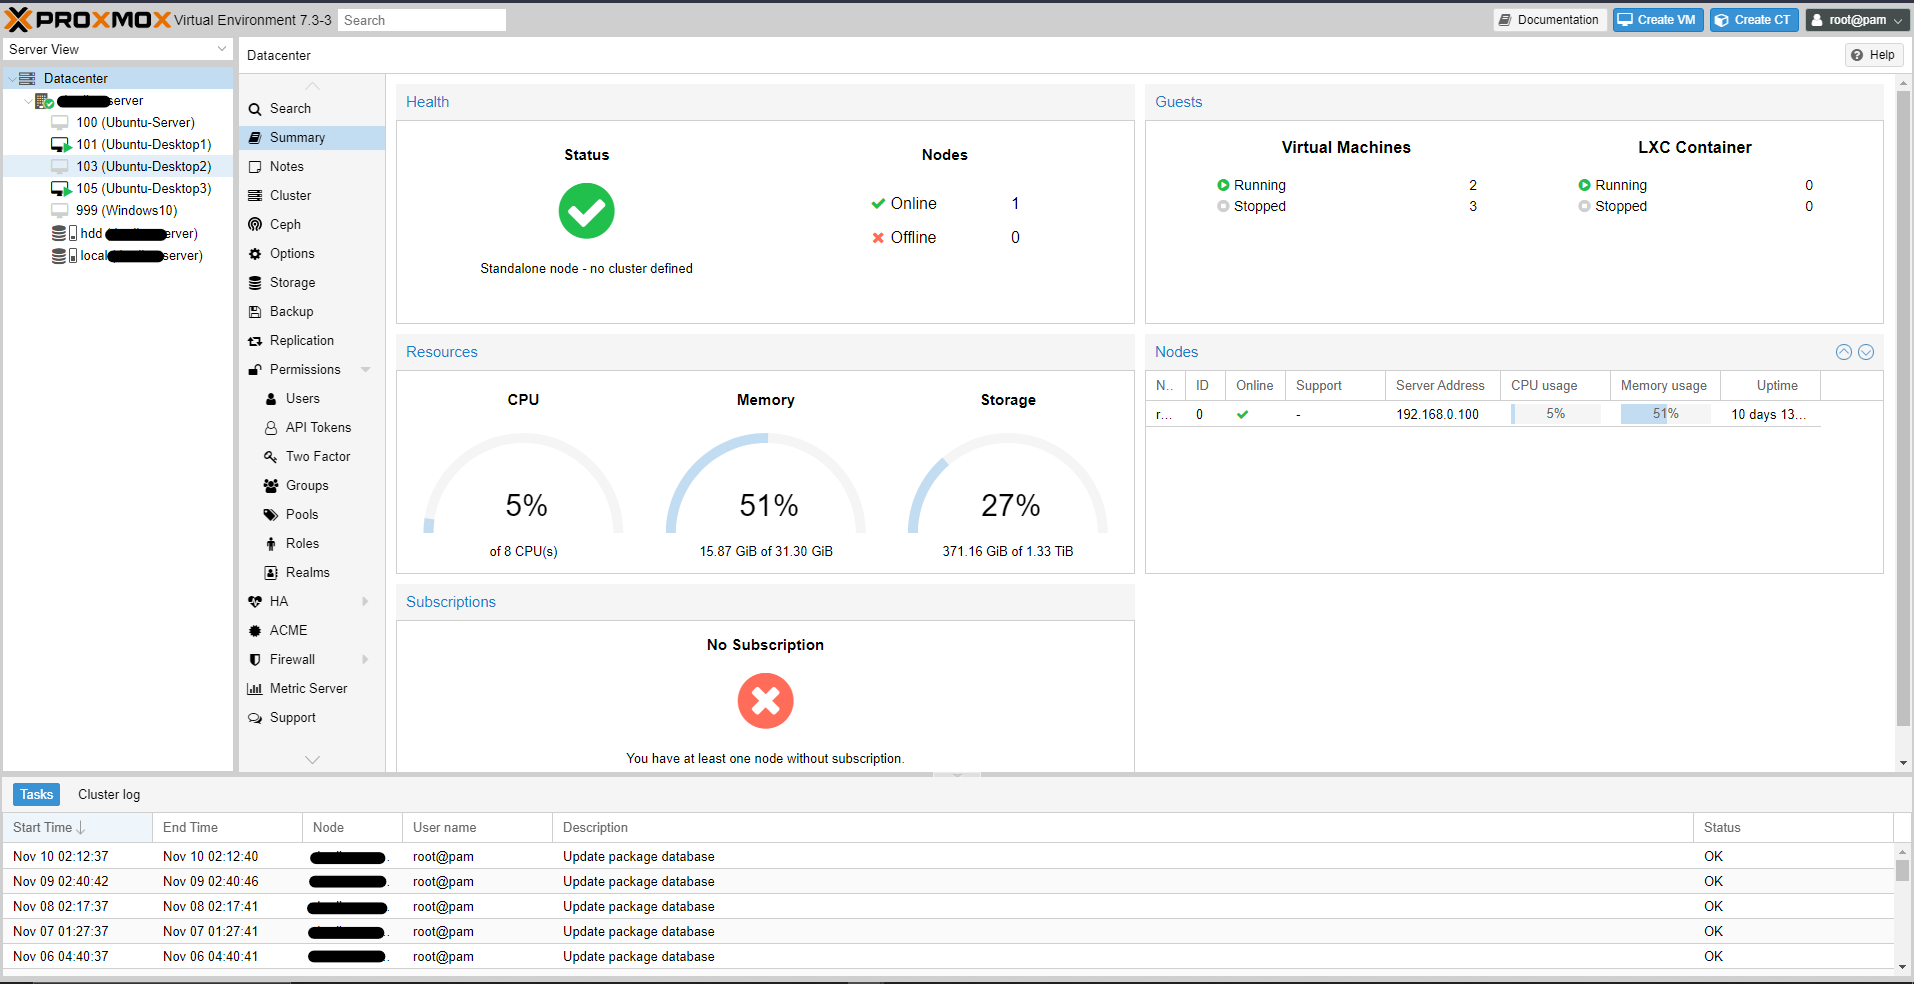
I systematically set up several virtual machines, each running on different operating systems, including Ubuntu, Windows, and Debian. The main goal was to fully grasp the ins and outs of deploying and configuring various operating systems within a server environment.
It was quite simple to set up the virtual machines; however, learning about the different architectures, such as x86 and ARM64, helped me understand why certain operating systems that are typically used for the Raspberry Pi weren't compatible with the Proxmox VE. This is a small downside to using this hypervisor; however, this does not take anything away from it, as I was able to deploy my VMs with ease.
Setting up the VMs was quite simple; however, there was one limitation that was discovered regarding the architecture of the OSs that Proxmox at the time could support. While trying to deploy images that are used on Raspberry Pi or Linux OSs using ARM64, even though Proxmox VE does have some experimental support for ARM64, it is not yet fully stable or supported. This means that it is not recommended to use Proxmox VE to run ARM64 VMs in production environments.
Having successfully established my Proxmox home server, I delved into the realm of virtualisation, leveraging Proxmox's capabilities to create a range of dedicated virtual machines for mulitple use cases.
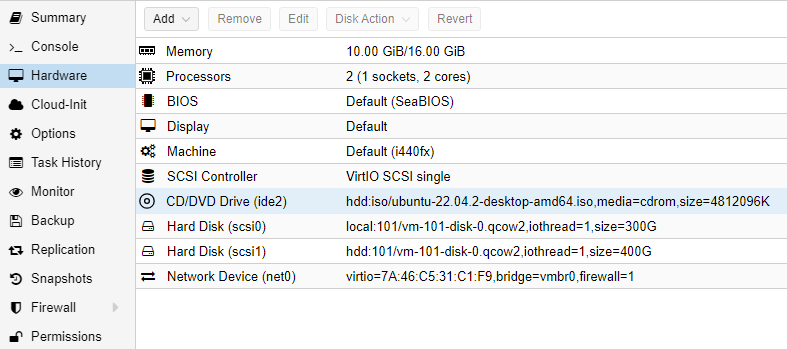
I started by allocating vCPU and RAM resources to my VMs. Because I had upgraded my CPU from the i5-2300 to a Xeon E3-1275, I was able to get 4 more threads, as it has Hyper-Threading technology, so although it is a quad-core chip, it is able to have double the virtual cores or threads that could be allocated to my VMs.
I opted to install the Docker engine on my Ubuntu virtual machines. Choosing Ubuntu as the primary operating system for my VMs was a deliberate decision, given its widespread usage and strong support in business server environments.
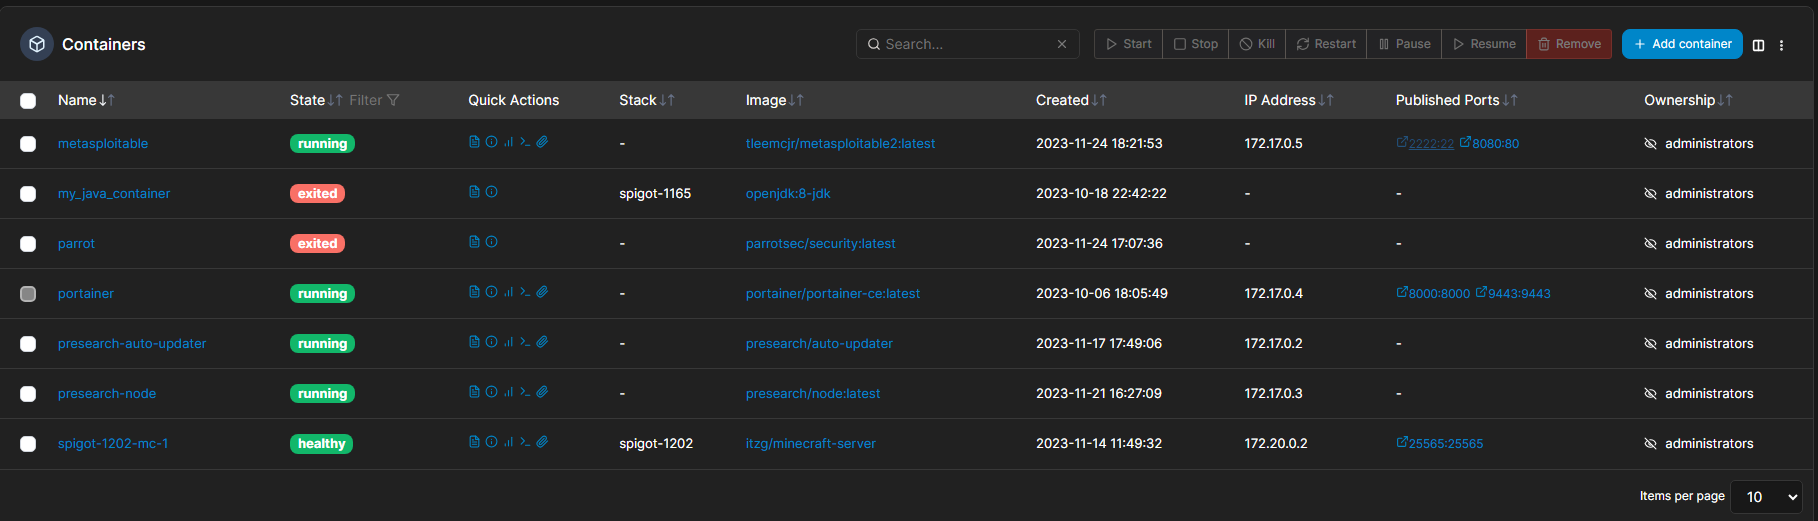
After configuring the Docker engine, my next step was to install Portainer. Portainer serves as a user-friendly Docker management tool, offering a graphical interface that streamlines the deployment and supervision of containerized applications. This proved invaluable for monitoring the status of installed containers, identifying issues such as online or offline status, and overall enhancing the visibility of networks and containers through the dashboard at a specific port.
Sources: